Grilling pizza is not just a cooking method; it’s a culinary adventure that brings together the smoky essence of grilling with the savory delight of a classic Italian dish. The process of grilling pizza transforms traditional pizza-making into an outdoor cooking experience, where the heat of the grill crisps the crust to perfection and infuses it with a distinctive charred flavor. Whether you’re a seasoned grill master or a novice looking to expand your culinary repertoire, mastering the art of grilling pizza will elevate your backyard gatherings and delight your taste buds.

1. Choose the Right Dough
- Quality Matters: Opt for pizza dough made with high-protein flour to ensure a chewy yet crispy texture that stands up well to grilling.
- Preparation: Allow the dough to come to room temperature before grilling to make it easier to stretch and shape without snapping back.
2. Prepare Your Grill
- Clean and Oil: Ensure your grill grates are clean and lightly oiled to prevent the dough from sticking.
- Preheat: Heat your grill to medium-high heat (around 400-450°F/200-230°C) to create a hot cooking surface that will cook the pizza quickly and evenly.
3. Grill Setup
- Direct vs. Indirect Heat: Start by grilling the dough over direct heat to achieve grill marks and a crispy base. Then, move the pizza to indirect heat to finish cooking and melt the toppings without burning the crust.
- Use a Pizza Stone or Pan: Place a pizza stone or a heavy-duty pizza pan on the grill to replicate the intense heat and even cooking of a traditional pizza oven.
4. Prepare the Dough
- Stretching: Gently stretch the dough into your desired shape, whether round, oval, or rectangular, on a lightly floured surface.
- Poke Holes: Dock the dough with a fork to prevent large air bubbles from forming during grilling, which can cause uneven cooking.
5. Grill the Pizza
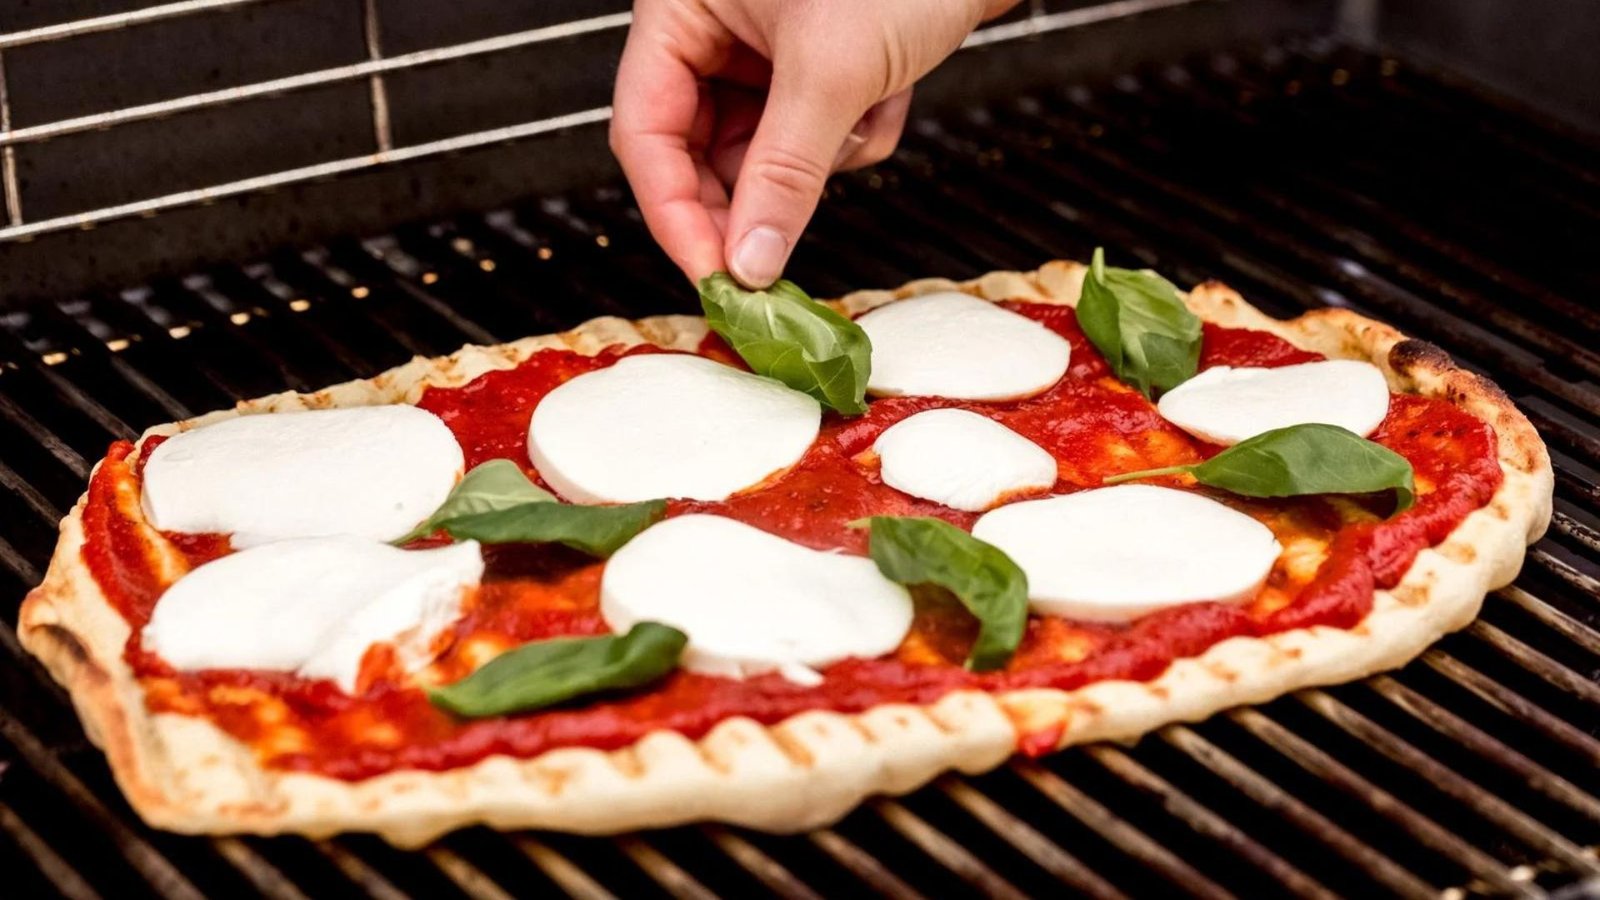
- Grill One Side First: Carefully place the stretched dough directly onto the preheated grill grates and cook for 2-3 minutes until grill marks appear on the underside.
- Flip and Add Toppings: Use tongs or a pizza peel to flip the dough. Quickly spread sauce, sprinkle cheese, and add your favorite toppings to the grilled side.
6. Monitor and Adjust
- Close the Lid: Close the grill lid to trap heat and ensure the toppings melt evenly without overcooking the crust.
- Rotate the Pizza: Rotate the pizza halfway through cooking to promote even browning and prevent hot spots on the grill.
7. Finish and Serve
- Check Doneness: The pizza is done when the crust is golden brown and crispy, and the cheese is melted and bubbly.
- Garnish: Add a finishing touch with fresh basil leaves, a drizzle of olive oil, or a sprinkle of grated Parmesan cheese before slicing and serving.
8. Experiment with Flavors
- Creative Toppings: Explore unique flavor combinations such as grilled vegetables, spicy sausage, or fresh herbs that complement the smoky notes from the grill.
- Seasoning: Enhance the pizza’s flavor profile with a pinch of sea salt, a dash of red pepper flakes, or a swirl of balsamic glaze for added depth.
Conclusion
Grilling pizza is not just about cooking; it’s about creating memorable culinary experiences that bring together the flavors of Italy and the outdoor grilling tradition. By following these top tips, you can confidently grill the perfect pizza in your backyard and impress friends and family with your newfound grilling prowess. Experiment with different toppings, shapes, and grilling techniques to make each pizza uniquely yours, and enjoy the delicious rewards of homemade grilled pizza.
With these expanded tips and techniques, you’re well-equipped to embark on your grilling journey and create delicious grilled pizzas that will delight everyone at your table. Enjoy the process and savor the flavors of homemade pizza straight from the grill!


